Saturday, November 27, 2010

How to Repair and Restore Antique Farm Tractors

john deere,antique,tractor,restore

Tractors have been used as farm implements since the time of steam engines. Classic tractors are restored and collected in the same way that people collect vintage automobiles. Depending on the starting condition of the vehicle, restoring a tractor can be a lengthy, labor-intensive process. It can also be a rewarding process that results in a collectible piece of history. Restoring classic farm tractors is a reasonable do-it-yourself project for anyone with basic mechanical knowledge.

Things You'll Need:
  • Drive-socket set
  • Wrench set
  • Screwdrivers
  • Adjustable pliers
  • Jack
  • Tractor manual
  • Sandpaper
  • Primer
  • Paint


Step 1:

Replace the tires on the tractor. Many tractors that have been sitting for long periods of time have weather-rotted tires. Putting new tires on the tractor will not only make it look nicer, but easier to drive. The exception is if the tractor has antique metal wheels, in which case, they will be treated as the other metal parts.

Step 2:

Rebuild the engine. Take the engine apart and clean each part until it has been restored to original factory condition. Inspect each component for any cracks or other defects, and replace any parts that have physical damage. Put the engine back together and refill all fluids, including oil and engine coolant.

Step 3:

Restore the metal parts of the body. Classic farm tractors in need of restoration will often have damage from rust. Sand all rusted areas until the rust is gone and bare metal is showing. Apply a coat of primer, and then paint the metal to prevent rust from recurring. If the rust has eaten a hole all the way through the metal, you will need to either weld a new piece of metal in place or purchase a replacement part.


Tips:

Research the history of your tractor to discover what colors the manufacturer originally used. Using the original colors will increase the appeal of the tractor on the collector market.

References:

Friday, November 26, 2010

How to Design Your Own Floor Plans and Blueprints

floor plan,blueprint,home and garden

Building a dream home is easy if you plan well. Floors are the most attractive thing in the design of the whole house.  Making a floor plan is vital for home decoration.  Before setting up a floor plan, it is important to decide how you will set up your furniture and other things on the floor. There are two ways of working out floor plans and blueprints. One is drawing out the plan manually using paper, scale and pencil. The other is using a computer software to build and plan the floor to any design that you want.

The term house plan, blueprints, floor plans can be confusing for a new builder. But designing and creating your own floor plans and blueprints on a piece of paper can be easy if you follow these simple step by step guide.

Things You'll Need:
  • Grid paper
  • Pencil
  • T-Square
  • Triangle
  • 6 Sided architect's ruler

Step 1:

Use the paper to draw the view of the whole home using scale of 1/4“ = 1’.  Get as much help as you can from the internet. There are websites that offer videos on how to draw the whole house using this scale measurement.

Use the formula to calculate the exact dimension of the floor.
Floor area = Length x Width of the room. 

Step 2:

Get the exact dimensions of each room, the total living space, the furniture, the closet, the electrical gadgets, telephones, and the other things that are to be placed on the floor. The room size should not be lesser than the minimum allotted by the Housing Authorities.  The recommend space is 125sq.ft while the minimum is 100sq.ft.  Living room should be at least 150sq.ft while the recommended value is 250sq.ft.  You can have the dining room as small as 120sq.ft.

Step 3:

Decide on the furniture to be placed on the floor.  Use the stickers.  You can even make your own pieces by cutting out furniture pieces from magazines.  Make sure they have common dimensions so that you can easily rearrange them.  Also allow some free space, in case you buy new furniture.

Step 4:

If your house is going to be a single story, then your plumbing fixtures can use a common wall.  Allow space for plumbing lines by making the wall 2X6.


Step 5:


Make photocopies of your plan and work it out with your building constructor. 

Using a software:
You can incorporate every conventional architectural floor design feature you need to make your home highly functional and beautiful for your lifestyle without any expertise from your side.  Software will come with pre-drawn shapes and furniture.  You can see your floor plan in 3D view as well.  You can save a copy of the file even in BMP, JPG and PDF formats. 


Tips:


Check the floor plan to see if you have utilized space wisely.  This will help a great deal when you start decorating the house.

There are home floor plan kits available in the market.  They are very easy to use and can be reused as well.  Some even come with Styrofoam miniature furniture.

Try to put closets near inner walls to provide insulation against noise.


References:

Sunday, November 21, 2010

How to Buy Gold for Spot Price in Singapore

gold,spot price,singapore,little india

The value of gold is commonly measured by a number referred to as the spot price. This price represents the wholesale melt value of gold on the market. The average consumer typically pays a rate much higher than the spot price, which is typically only paid by institutional investors  dealing in thousands of ounces of gold. Singapore is one of the few places where any member of the public can buy gold at spot price, without having a minimum order size.

Things You'll Need:
  • Investment Capital 

Step 1:

Select the price point at which you will buy gold. The value of gold changes slightly from day to day. Identify the target price at which you would like to buy gold. Monitor the market with a financial publication or financial news network and wait for your ideal purchase price.

Step 2:

Go to Little India. Although Singapore is predominantly Chinese, the Indian section of the city is most widely known for it's gold suppliers. Little India is situated along Serangoon Road, between Kitchener Road and Bukit Timah Road.

Step 3:

Visit one of the many gold vendors located along Serangoon Road. Jewelers are referred to as goldsmiths in Singapore. Any of these stores sell their gold according to the current spot price. Because much of the gold comes in the form of jewelry, sometimes even antique items, the actual value of the item may exceed the spot price.

Step 4:

Discuss the amount you would like to spend. The merchant will weigh an amount of gold for you, based on the spot price, measured against the purity of the metal. For example, 24k gold is pure and will be weighed according to the spot price. However, 14k gold is only 58 percent pure, so it takes a larger quantity to meet the spot weight.


Tips:

Gold can also be sold to the same goldsmith you buy from, allowing you to profit by buying and selling from day to day.


References:

Resources:
Read More Like This

How to Test Streaming Media with Unix

streaming media

Steaming media is a way of sharing audio and video content over the Internet. Often referred to as rich media, these files can be quite large. To stream the digital files, they are compressed and encoded. The end user then uses a media player to decompress and play the files. This compression and decompression technology is referred to as a codec. The codec must be tested periodically to make sure you are producing the highest quality media stream available.

Things You'll Need:
  • Media Player
  • Streaming Content

Step 1:

Run an "ipfw" test. Unix systems have an inbuilt test within the operating system. To begin testing the capability of your network in streaming, open the command console and type in the command "ipfw" (without the quotation marks).

Step 2:

From the ipfw window, add the following lines.

sudo ipfw pipe 1 config bw 400kbps
sudo ipfw add 10 pipe 1 tcp from any to me 1935
sudo ipfw add 11 pipe 1 tcp from any 1935 to me

Once these commands have been typed into the operating system, your bandwidth connections in Unix operating systems will open up and improve. This method also gives information on how well your computer can stream online media.

Step 3:

Print the results of your test. Restart the computer to clear the memory and return to normal operation.


Tips:

There are different forms of media available for streaming. The most common is the flash video (FLV) format, which allows users to create and upload average-quality videos. The bigger the file, the better the video and audio quality.


References:

Resources:
Read More Like This

How to Locate a Bad Wire in a Wiring Harness

Photobucket

A wiring harness, also known as a cable harness, consists of a batch of wires and cables. These cables transmit signals containing information, as well as energy in the form of operating currents. They are generally bound together by things such as cable ties, conduits and electrical tape, and are then organized in the form of a wire harness. The harness organizes cables according to their purpose, making it easier to trace down problems with complex electrical systems.

Things You'll Need:
  • Magnifying Glass
  • Advanced Electric Meter
  • Digital Multimeter

Step 1:

Visually inspect the wires in the harness. A magnifying glass can be used to give better perspective. Look for any places where the insulation has been damaged, or for obvious burn marks caused by exposed wiring. Also check to see if the contact points are contamination free and do not have any visible corrosion.

Step 2:

Prepare the harness for a continuity test by turning the power off, since an open circuit could result in the meter getting damaged. Use a fuse or breaker to cut off the power supply for the entire harness.

Step 3:

Perform a continuity test with the aid of a multimeter, as this helps to find breaks and resistances in a circuit. Place the settings on the digital multimeter to "Resistance" so that it can give an effective reading. If an Advance Electric Meter is used, change the settings to the lowest and reset the meter by ensuring the two probes touch together and then turning the thumbwheel until the meter shows zero.

Step 4:

Use the multimeter's probe tips to touch the surface or area which you wish to find a damaged wire in. A low reading means that the circuit is closed and has no bad wiring, but if it reads as "Infinite" it means that the circuit is open, indicating that a wire is damaged.


Tips:

Using a digital multimeter allows you to check each wire individually, allowing you to quickly identify which specific wire is causing the problem.


References:
Read More Like This

Saturday, November 13, 2010

How to Find My IP Address Using Flagfox Geotool

ip address,technology,internet

An Internet Protocol (IP) address is a unique number associated with a specific device, such as a computer  or network printer. Devices use IP addresses for identifying and communicating with each other. An individual network device or system must have its own unique IP address. The IP address associated with your home Internet connection makes it possible to identify your web surfing activity. It is easy to see what the IP address of your computer is.

Things You'll Need:
  • Internet Connection

Step 1:

Open your web browser and locate the address bar. Type the address of Flagfox Geotool (see References) in the address bar and press "Enter." A new page will open.

Step 2:

Input your domain information in the space provided. The page will display areas for "Hostname," "Country," "Region," "City," "Country code" and "IP Address/Hostname." Type your domain name in the "IP Address/Hostname" box and click the "Submit" button. Then you will find your IP address of the provided domain name.

Step 3:

Review the information. You find not only the domain name, but also information about the country, city, region country code, ISP, flag, local time, latitude and longitude. 

Step 4:

Make note of the IP address. Write it down for safekeeping.


Tips:

Note that your IP address will be changed each time your Internet connection is restarted, so if a power outage causes your modem to reboot, you will have a new IP address.


References:
Read More Like This

How to Check and Maintain Proper Tire Air Pressure

tire,air pressure,auto

Maintenance of proper air pressure can extend the life of your tires. It helps your tires retain traction with the road, even in adverse conditions, and can increase the fuel economy of your vehicle, so you can drive farther on the same amount of gas. Keep a few basic tips in mind as you regularly check the inflation of your tires.

Things You'll Need:
  • Pressure Gauge
  • Air Compressor

Step 1:

Check the inflation in the morning, before the car is driven and while the tires are cool. Set the pressure according to the vehicle manufacturer's recommended cold-tire pressure.

Step 2:

Adjust the pressure for extra-cool conditions. If the car has been parked in shade for many hours, check the pressure using the gauge and adjust the pressure higher by two pounds per square inch, or PSI.

Step 3:

Adjust the PSI to account for the amount of time you have driven the vehicle within the previous three hours. When driving short distances or speeds less than 45 miles per hour, set the pressure four PSI higher than the recommended cold inflation pressure. When driving for long distances, set the pressure six PSI higher than the manufacturer's recommended cold inflation pressure.


Tips:

Most tire pressure gauges have a stem on the back side. This stem can be pressed into the tire's valve stem to release air, in the event that you have added too much pressure.


References:
Read More Like This

How to Age Ivory Micarta

ivory,craft,hobby

Micarta is a synthetic form of ivory that looks and feels identical to the natural version. Ivory micarta is used in a wide variety of consumer products, from gun and knife handles to piano keys. A popular method of customizing ivory micarta is to put it through a simulated aging  process, which makes the material look more like antique ivory than a new item. This process can give many items a vintage look that many people find appealing.

Things You'll Need:
  • Ivory Micarta
  • Coffee, Tea or Wine

Step 1:

Tan the ivory micarta. Put the ivory micarta in a room that gets plenty of sunlight. Put the material where it will get partial sunlight and leave it there for two weeks. If the ivory micarta is a knife handle, make sure both sides get equal "tanning" time. After two weeks, check the color. If you are not satisfied with the effect, "tan" it for two more weeks.

Step 2:

Polish your ivory micarta. Use a commercial polish to change the color. Make sure the polish is a colored compound. Start by using as little polish as you can, and increase the amount until you get the desired finish. Try to polish equally on both sides. You can also try polishing the material with turmeric, but this color change may not last long.

Step 3:

Stain the ivory micarta. Brew coffee or tea and leave the ivory micarta in it overnight. Be aware that this method may give uneven color. Wood stains are also recommended. Another alternative is to use wine.

Step 4:

Dye ivory micarta whatever color you wish. Leather or oil dyes work well. Use an old cloth to apply the dye according to manufacturer instructions. This process typically involves allowing the dye to set for a prescribed period, then washing the ivory. Dyes may last longer than stains and polishes.


Tips:

Experiment on a spare or scrap piece of ivory micarta before using a new technique on a final product.


References:
Read More Like This

How to Determine Your Heating Air Duct Requirements

heating,air,home improvement

The heating and air conditioning system  is an important consideration to keep in mind when building a new house. Installing the ductwork for your heating and air is more difficult and costly if done after construction is complete. This makes installing ducts in a new house somewhat easier than doing the same job  in existing construction. The process of installing heat and air ducts is a straightforward process that only requires the installer to follow a few standard instructions.

Things You'll Need:
  • Building Plans
  • Heating and Air Conditioning System
  • Air Ducts

Step 1:

Keep the home's heat gain in mind. Look over your building plan and consider the number of bedrooms and the total size of the house. You can refer to the house's total heat gain computation, which is dependent on the material it is built with, whether it has insulation, and the overall size of the home. As a general rule, the bigger the house, the bigger the heat gain, the larger capacity of the required air conditioning system.

Step 2:

Consider the placement of your air conditioning and heating systems, particularly if they will be sharing the duct work. Your heater and fan will most likely be at the basement, while your air conditioning condenser will usually be outside.

Step 3:

Consider the size of the air ducts you will be installing. Because the air conditioning fan needs to maintain constant pressure across all areas of the duct work, you should consider the correct size and proportion of the air ducts. As you go higher through the house, and as the air ducts actually drive air into a room, the size of the ducts must be decreasing, so that the air being pumped is in constant pressure.


Tips:

For best results, consult with an HVAC contractor on the proper design and materials you will need for your heating and air conditioning system.

You will need to plan and build return air ducts. These are air ducts that have air flowing in reverse of the original air ducts. These are necessary to maintain the correct flow of air into each room, and likewise outside from each room and back into the air conditioning system. Reverse air ducts are usually situated directly opposite the in-flowing ducts.


References:
Read More Like This

Friday, November 12, 2010

How to Learn Microsoft FoxPro Online

microsoft,foxpro,software

FoxPro is a text-based procedural programming language  that is very useful for creating interactive, high-end performance software and powerful database management systems. If you are new to FoxPro or have some skill in the field, you can learn FoxPro in a short period of time by enrolling in an online study course that will teach you how to use FoxPro efficiently. There are a number of great course options that use video tutorials to teach you how to program with FoxPro.

Things You'll Need:
  • Microsoft FoxPro

Step 1:

Identify which version you want to learn. There are many versions of FoxPro in use, with Visual FoxPro 9.0 being the latest. Since the differences from one version to the next are minor, it is generally recommended to learn the most recent version, even if you expect to use a previous version of FoxPro.

Step 2:

Decide which FoxPro course you wish to take. There are several great courses to choose from. Microsoft, Garfield Hudson and Alvechurch Data are popular options that team both beginner and advanced lessons in how to program with FoxPro.

Step 3:

Enroll in the FoxPro course at the site you have selected. Most sites offer free and affordable online FoxPro courses, with tips, e-books, pdf files, how-to articles and practical tools. Some websites offer video lessons, which feel more like a traditional classroom setting. You can read through the articles and books to learn on your own. Certified courses will require a fee. Some online FoxPro sites offer career and certification training by format and location.

Step 4:

Open your lesson plan. The tutorials will provide coding tips and techniques. You can also choose downloadable videos on FoxPro. You can redo the exercises and lessons at your own pace. The best method would be to copy the lessons with your own version of FoxPro. Learn the codes unique to this version and unlearn the older codes and commands of the previous version. They have been known to give varying results. Also the SELECT -- SQL limitations of the command are now obsolete.

Step 5:

Attend online classes to learn FoxPro in a detailed and extensive way. Online tutors provide virtual classrooms for one-to-one training. Unlike videos, the student gets the chance to interact directly with the instructors in a classroom environment.


Tips:

Taking a periodic refresher course may remind you of elements you have forgotten.


References:

Resources:
Read More Like This

How to Open an Online Currency Exchange

currency,exchange,money,business

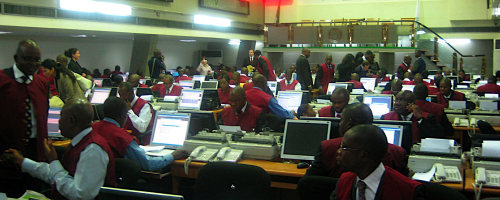
Running a currency exchange has the potential to be a lucrative business. The traditional business model for currency exchange businesses  is simple. Locate yourself where travelers can be found and provide the service of exchanging the currency of one country for the currency of another, charging the consumer a small fee for the transaction. Online currency exchanges work in a nearly identical manner, with the exception that you are trading one digital currency for another, or sometimes cashing out currencies for consumers.

Things You'll Need:
  • Investment Capital

Step 1:

Conduct research into the market you are entering. Identify who the major competitors in the market are, as well as what their strengths and weaknesses are. Make note of their fees in a comparison chart that will help you decide how to price your own services. Pay particular attention to any areas that the market underserves or does not serve at all, since these are areas where you can gain a competitive edge.

Step 2:

Write an online currency exchange business plan. Download a free business plan template and fill it in with details about the online currency exchange that you will be starting. Detail how you will enter the market, what your operational plan is and what staff you will need to carry the plan out. Having a written business plan that covers every foreseeable aspect of the company's operations will help keep the currency exchange on track, even during hectic times.

Step 3:

Obtain the investment that is required to start your currency exchange. Use your business plan to meet with banks and potential investors. Business loans, personal loans and venture capital investment firms can serve as the primary source of funds for your business. Your bank may also be able to qualify you for an SBA guaranteed loan from the Small Business Administration.

Step 4:

Register a company to obtain a business license for your online currency exchange. Contact either your local City Clerk, County Clerk or Secretary of State to obtain the appropriate forms to register a Limited Liability Company (LLC). List someone to serve the roles of President, Secretary and Treasurer. The same person can serve all three roles. Also, list each of your investors as members, declaring what their contribution was and what percentage of ownership they have in the venture.

Step 5:

Decide which currencies your online currency exchange will deal with. Remember that most of your business will come from people who have money in one ecurrency and want to trade it for money in a different digital currency. Also, make a final decision on what fees you will charge for each currency. The fees should be high enough to profit on top of the transaction fee you will bill, but should also be low enough for your currency exchange to remain competitive in the market.

Step 6:

Choose a software program to manage your currency exchange. You can hire a team of PHP programmers to create a custom software program, or you can purchase a commercial package off the shelf. Some online currency exchanges prefer to operate with no software at all, and process each transaction manually. While this is more time consuming, it cuts down on the chances of a fraudulent transaction getting through.

Step 7:

Procure the hardware that is needed to run the software. Since online currency exchange software is designed to be implemented over the Internet, a standard web server meets the typical system requirements for the software, and can also be used to host the currency exchange website. Note that you will most likely require a dedicated server, particularly when your online currency exchange is fully operational and processing a large number of server queries.

Step 8:

Create a website for your online currency exchange. Keep in mind that the currency exchange website is more than a place for members to log in. The website also serves as your first impression to potential customers. The process of building a website involves purchasing a domain, obtain a web hosting account and writing the HTML or PHP code that tells the web browser how to display your site. Most people who are not web developers prefer to outsource this step to a company that designs websites professionally. Make sure the design is clean, easy to navigate and generally professional in appearance.

Step 9:

Implement any sales and marketing strategies that you have developed to announce your presence in the market. Consider who your target audience is and what methods are available to reach that audience. Internet advertising, such as banners and sponsored links, work great for advertising an online currency exchange. Magazine and radio ads are also good options. Narrow the focus to determine which of those are within your budget, and also consider what the CPM (cost per thousand customers) is for each option.


Tips:

Keep on top of industry trends, especially with the latest tactics to battle credit card fraud and cyber phishing. Joining trade organizations, such as the Community Currency Exchange Association, will help you stay on top of the latest news.

References:

Resources:
Read More Like This

Thursday, November 4, 2010

How to Build a Ladder Website

ladder,website

Everything is easy when you know how it is done but to make a ladder website is an entirely different thing.  For one, knowledge of programming languages will be a big help.  Even if you do not know Perl/VB or are new to coding, you can get help online from those who do know the stuff.  There are also written scripts available for free on the internet.  Once you get hold of that you are well on your way to make a ladder website.

Things You'll Need:
  • Domain
  • Web host
  • Ladder content

Step 1:

Get to know the elements that are involved.  A ladder website can contain rudiments like blogs and forums, activities like previews and reviews, codes and scripts free or at a cost for users and also your facebook and twitter accounts. 

Step 2:

Think of a theme for the site.  The ladder website should have a main theme, say for example action games.  Make layouts related to the theme.  Save them as templates which you can use as you add on more pages.

Step 3:

Design the logo and banners.  Select relevant graphics and colors. 

Step 4:

Organize your rungs.  The gaming activities should be foremost as they will be the ones that get published the most, probably more than 5 times in a day.  Next will follow the social networks depending upon their frequency.  The blogs can follow next and lastly your newsletter which will be only once a week. 

Step 5:

Collect ladder scripts from well-known sites.  If they are offered free, check them well as they may have a lot of mistakes.  You can even take them apart and redo them according to your needs.  You can also make your own scripts if you know programming.  If that is going to take much of your time, pay the experts to make them especially for you. 

Step 6:

Get a hosting domain.  A simple Google search will bring up free and paid domain hosting sites for you.  For a ladder website, the most recommend one is that go for the paid ones as they will offer more options and flexibility. 

Step 7:

Select relevant keywords.  They are the success behind your site.  The right keywords will bring in new people everyday through search engines.  Once you put them in your site, try them out by inputting them in search engines and checking the results.  If your site does not come up in the first two pages, then try other keywords.  

Step 8:

Test out the site.  First, post a small content with the keyword in the first rung of your ladder to check its popularity with the readers.  Then check out the workings of the ladder to work out any faults in the scripts. 


Tips:

Make sure the ladder is easy to understand and user friendly.  If it is confusing, your readers may not visit you again.  


References:

Wednesday, November 3, 2010

How to Restore Classic Farm Tractors

antique,tractor,agriculture

There are many types of tractors for doing various farm works. Know the type of tractor you have. Take a thorough look at it to know what it needs. Gauge its weight and horsepower to know its potential. You can also convert the tractor to do other jobs by implementing certain parts to it. It might prove expensive as you might need to change damaged parts and upgrade other parts. However, at the end of it, you will have a tractor which is as good as new. 

Things You'll Need:
  • Drive-socket set
  • Wrench set
  • Screwdrivers
  • Pliars
  • Jack
  • Tractor Owner's Manual


Step 1:

The tires might have been filled with liquid to make it heavy. But this water could have frozen during winters and caused damage to the tires. So replace the tires first.     

Step 2:

Take out rusted parts and clean off the dirt and rust. Repaint the parts with a protective paint. 

Step 3:

Check the coolant by removing the radiator cap. Inspect the liquid inside. If the liquid is an antifreeze solution, it is good. Even clear water should be ok. The color also has to be clear. If it is brown then it could have been caused by rust. This is a bad sign as it signals a structure weakened by rust. This could cause a leak. It also should not be oily. This will mean sealing work where oil is leaking into the coolant. 

Step 4:

Horsepower has to be regained. This is vital as you need the horsepower proportionate to the load of work it needs to do. The engine will have to be made frictionless and the transmission restored. If there is a leak in the transmission shaft seal, then it will have to be replaced.

Step 5:

Assess the sediment bowl for rust. This rust is from the tank. A little is ok. An occasional cleaning will be required. But if there is a lot then the tank will have to be changed.

Step 6:

Change fluids and replace the battery. In most cases, this should be enough to get the tractor going again.

Step 7:

Check the sheet metal whether rust has a hold on it. Rust remover and a coat of paint will make it look like new. Weld any cracks that you can see before you paint it. You can also use epoxy to hide cracks.


Tips:

If you are buying an old tractor, run it first for a few minutes. Listen for knocks or other weird sounds. Stop the engine and restart it. Sometimes the engine might act up. Also inspect for leaks. This preliminary examination will tell you whether the tractor is safe to buy or not.


References:

How to Restring Pella Blinds

pella,blinds

Pella was founded by Pete and Lucille Kuyper in 1925. They came from the small Dutch community of Pela, hence the name. They invented a special window screen which had the ability to roll up and down like a shade. As of today the company is still run by the Kuyper family along with professional help and is the 2nd largest manufacturer in America of patio doors, windows and entry doors. Pella has a team of over 8600 members who work diligently to ensure the best quality and have more than 200 window and door showrooms.

Things You'll Need:
  • Pella Window Blinds

Step 1:

Firstly remove the shade by pulling on the “U” shaped tab which is located on the corner. By doing this the side part of it would be removed. What’s required next is to move the shade away from the side hinge and to the side where the clipped panels are, which will remove it completely. (The new models come with hinges instead of clips)

Step 2:

The next step would be to pull the tab and then put the removed shades back in to the proper place. Pella blinds are now cordless therefore all one must do is check where the shade operator handle is located which is generally near the bottom of the panel. This can be found generally prior to the inserting the panel. Once this is done it will enable the operator handle to raise and lower the shade without any hindrance.

Step 3:

Then what is required is to place the blind into the removable glass panel, which is done by sliding the top part of the blind into the stud which helps to mount it. Then the operator drive should be changed to the drive gear which is the hole shaped area. This side is marked as A and is located on top of the head rail.   In certain cases you might have to move the blind operator handle upwards to ensure proper alignment of the blind.

Step 4:

Then firmly secure the blind head rail by pressing on the opposite side of the head rail over the other mounting stud, which is labeled as B on the top side of the shade. Finally close the hinged panel or in the case of the old blinds make sure the clip panel is reinstalled and closed completely. Failure to do so could result in the windows being fogged up.


References:
 

Sunday, October 31, 2010

How to Start a Web Agency

web agency,business

Web Agencies are used by many companies, and are considered to be a somewhat cheaper form of advertising. They can also serve various other purposes, from delivering the company’s brand message to providing customer support services.  Web agencies typically specialize in services such as email marketing, web designing, micro sites, banner advertising and even optimization for search engines.  The process of starting a web agency is largely the same as forming any other business, with the exception of a few special considerations.

Things You'll Need:
  • Internet Access

Step 1:

Hire a web developer who can develop a website for your web agency. Come up with a name for your site. Use a name or company tag line that identifies the services offered to potential clients.

Step 2:

Take time to consider the services which you want to offer the consumers. You can allow the clients to choose their selected fields such as demographics, geography, art, health, lifestyle and so on. Wider coverage means better business in the end. Also allowing capability to have an online magazine which can be referred to as Ezine can enable clients to draw traffic to the sites they make.

Step 3:

One of the most important services that should be implemented when creating a Web Agency is the Search Engine Optimization or SEO for short.  This enables the clients sites to be recognized with the aid of keywords .For example If the client is trying to sell a product related to medicine the search engine will take key words from it and implement it to their database, so potential customers can see the site when searching for such items.

Step 4:

Advertisements can be added to the Agency website as well, and this will help divert web traffic to the client’s website. The Web developer software gives several options to choose, such as adds which pop up, or pop under, ads which float and the famous banner ads and side bar ads all which help spice things up in the website.

Step 5:

Last but not least, after the site is made, it should be promoted in such a way that people can find it and easily access it, which is done by doing some of the techniques mentioned above as well as typing articles and newsletters giving descriptions about the site and what it contains.


References:

Saturday, October 30, 2010

How to Become a Puerto Rican Travel Agent

puerto rico

Travel  agents are a lifeline for many travelers. Agents can wade through the various rates of different airlines and hotels to create a customized travel package that makes the most of your vacation  budget. Because it is a popular tourist destination, Puerto Rico offers a lot of travel opportunities, and by extension, creates opportunity for travel agents.

Things You'll Need:
  • Degree in Travel and Tourism

Step 1:

Learn about Puerto Rico. If you are a travel agent who is relocating to the area, take the time to familiarize yourself with the island. Research the Internet for articles and read about the island's attractions. Get to know Puerto Rico through the eyes of the locals. There are many things that only a native would know. Hire the services of a local travel agent and enjoy a guided tour. This will give you an idea of the competition as well as what a tourist would want.

Step 2:

Get practical job experience before relocating to Puerto Rico. Work part-time or full-time in a travel agency where you currently live. This will give you an idea of what to expect if you decide to follow a career in the industry. If you are not qualified to be an agent, then take any job in the office, which would offer a great opportunity to learn from professionals in the office.

Step 3:

Earn a degree in travel and tourism. The University of Puerto Rico at San Juan has a program for travel and tourism, as does the University of the Sacred Heart in Santurce. You also will increase your chances of becoming a Puerto Rican travel agent if you have been employed as a travel agent in an agency endorsed by the International Air Transport Association (IATA) or the International Airlines Travel Agent Network (IATAN). Membership in these organizations brings legitimacy to your experience.

Step 4:

Learn to speak Spanish. Spanish is the national language of Puerto Rico. Being able to communicate with those who do not speak Spanish will help you to become a travel agent in Puerto Rico.

Step 5:

Obtain the proper work visas. Citizens of Puerto Rico and the United States do not need to apply for a tourist or work visa. However, citizens from other countries might need the proper visa. An American citizen needs only to provide proof of identification to enter the island. If a visa is required, make sure you get the right one. A travel/tourist visa only allows you to enter Puerto Rico, whereas a work visa will allow you to both enter the country and find employment.


References:
Resources:
Read More Like This

How to Run Word 2002 on Windows XP

word 2002,windows xp,microsoft

Windows XP is a popular version of the Windows operating system. The operating system is no longer sold and has been replaced with Windows Vista and Windows 7. Despite the fact that it is no longer on the market, Windows XP is still installed on many computers  that were on the market prior to this decision. Chances are that you will encounter this operating system on a regular basis. When you do, it may help to understand how to run your standard software on Windows XP, such as Word 2002 or other Office software programs.

Things You'll Need:
  • Microsoft Windows XP
  • Microsoft Word 2002

Step 1:

Download the Microsoft update patch (see Resources) that will allow you to install Word 2002 on Windows XP. The Windows XP operating system requires a manual approach for the necessary update.

Step 2:

Open the package once it has been downloaded. Begin the installation wizard. Select the express option because it contains all the necessary upgrades for the update. Follow the on-screen instructions to complete the update installation.

Step 3:

Go to the Microsoft website and download the Windows XP compatibility pack for Word 2002. (See Resources.) Open and install the compatibility pack so that your Windows XP operating system will be prepared for the programming in Word 2002.

Step 4:

Insert your Microsoft Office 2002 CD and install the software. Restart the computer once installation is complete. You can now open and use Word 2002 without restriction.


Tips:

Check the Microsoft website frequently for newer version releases to both the Windows operating system and Microsoft Word.


References:
Resources:
Read More Like This

How to Prime a Heating Oil Tank

oil tank,furnace,heating

Priming a heating oil tank is done when oil in the tank is depleted. If the tank has been allowed to burn itself out, there will be no oil in the fuel lines to restart the system. In this case, priming is used to get the flow of oil started so that the heater can restart. The process is not difficult by following a few basic steps, but caution should be exercised at all stages.

Things You'll Need:
  • Box end wrench set
  • Bucket
  • Scrap cloth

Step 1:

Find the bleeder port. This generally is found above a return or bypass valve. Use a wrench to loosen the bleeder port. Once loose, oil will seep out through the bypass. Use a bucket to collect the oil.

Step 2:

Turn on the power to the oil burner. Oil should begin spraying into the bucket. Once the oil flow is steady, the oil burner should be shut off. This takes about 30 seconds. If there is no flow, press the reset button and try again.

Step 3:

Allow the tank and heating system to stand for several minutes, then start the oil burner. Burning should begin immediately. Check to make sure there is a consistent flame inside the heating system. Use the control valves to increase or decrease the flow.


Tips:

Oil leaks can be cleaned with special cloths and kitty litter.

Warnings:

When maintaining an oil tank, it is important that the oil tank does not run lower than 1/8th of its volume. When a tank runs dry, impurities may gather and block outlets in the system.


References:
Read More Like This

Friday, October 29, 2010

How to Become a Dirt Bike Parts Dealer

dirt bike

A dirt bike is a lightweight, off-road  motorcycle, built with a strong frame, exceptional tires, and solid suspension to suit all kinds of terrain. Though dirt bikes are designed to be sturdy, their parts are vulnerable to wear and tear, as with any type of motorcycle. Hence they need frequent replacement parts. Dirt bike parts are in great demand nowadays because of the popularity of the bike. Anyone can become a distributor of dirt bike parts if he knows the design elements of different dirt bike models and the mode of operating the business.

Things You'll Need:
  • Start-Up Capital

Step 1:

Search for suppliers. Find the best dirt bike parts manufacturers in the country or abroad. Do an extensive search for manufacturers on the Internet. Inquire about leads from your friends and other business people. When you search for dirt bike manufacturers, check whether they provide top-quality company and off-brand parts. Besides determining that it makes top-quality parts, you must also check with the manufacturer to be sure it produces dirt-bike parts that the customers need.

Step 2:

Shop for financing. To become a distributor of dirt bike parts, you need to have enough money to start the business. It should not be a stumbling block because there are various means to get the money you need. A bank loan is a great source of funding. You will need to provide a solid business plan and an estimate of the possible financial returns from the business to get the loan. However, if you wish to avoid all formalities of bank loans, there are many private finance companies that are willing to offer finance for small business operations.

Step 3:

Study the various parts of different dirt bike models. As a dirt bike parts distributor, you should know about the various parts of the motorcycle and which part is needed the most and how to obtain it quickly.

Step 4:

Communicate effectively. The most crucial thing a distributor should possess is excellent communication skills. Since the field of distribution encompasses buying and selling, you need good negotiation skills, a nose to sniff out the next "hot" dirt bike part and keen salesmanship. You should sell the product at an attractive price without sacrificing profits. For this, buy the parts from companies that sell at reasonably low prices and resell them at a higher price to make a good profit.

Step 5:

Advertise your business. Once you open your shop, make sure people know about you. Place ads with your address in sports magazines and online directories. You can even have your own blog. This will encourage dirt-bike lovers to communicate with one another and to buy their spares from you.


References:
Resources:
Read More Like This

Thursday, October 28, 2010

How to Test Gold Purity with a Scratch Test

gold,purity,scratch test

The value of gold depends on two factors; how much the gold weighs and how pure it is. The science of measuring the purity of gold is assaying. Professional assayers typically use specialized laboratory equipment  to certify the purity of gold down to the number of micro-particles. While this is not practical for the average person to do on their own, some methods will give a more general measure of the purity. One such method is to perform a scratch test, which will allow you to verify how many carats the gold is.

Things You'll Need:
  • Touchstone
  • Testing Keys
  • Testing Solution

Step 1:

Visually inspect the gold. Look for any stamps or other markings that will identify the purity of the gold, particularly if the item is a piece of jewelry. Although these stamps are not always accurate, they will give you a good early indication of what you are working with so that you can narrow the number of testing keys you use.

Step 2:

Scratch the source gold on the touchstone. Find an obscure place on the item so that scratches will not be immediately evident. Press down firmly and rub the gold back and forth several times, so that the gold is scratched against the surface of the stone.

Step 3:

Scratch the test keys on the touchstone. Select two or three testing keys that you feel are probable matches for the source gold. Firmly scratch each key on the touchstone in an area near the scratch of the source gold. Remember which scratch belongs to which testing key.

Step 4:

Drip one to two drops of testing solution onto the scratch test area. Note that the scratches begin to change colors, with each degree of purity being a different color.

Step 5:

Look at the color of the scratches. Compare the color of each scratch to the color of each tuning key. Matching the color of the scratch with the color of the key will tell you that the source gold is the same purity as the key that made that particular scratch. 


Tips:

Using a scratch test is not a scientific measurement of purity. It is, however, an accurate assessment for on-the-spot verification of gold purity.


References:
Read More Like This

How to Put on Link Style Tire Snow Chains

snow chains,tire chains,automotive

Roads can become slippery quickly in snowy conditions. These driving conditions often result in accidents and in vehicles  being stranded and unable to move. Driving in snow and ice requires special precautions, one of which is to use snow chains on your car tires. Snow chains, which are also called tire chains, are attached to the tires of a vehicle in order to increase traction in snowy conditions. Installing link type snow chains requires practice and patience.

Things You'll Need:
  • Link type snow chains

Step 1:

Park the vehicle in a level area, ensuring that there is enough space around the vehicle to lay out your snow chains and tools. Make sure that the engine is off and the emergency brake has been applied. 

Step 2:

Lay out the chains on the ground, rolled out in front of the tire they will be installed on. Put them on the front tires for front wheel drive vehicles, and on the back tires for rear wheel drive. Make sure that the beginning of the chain is in contact with the tires and that the chain is laid out in a straight path for the tire to roll onto.

Step 3:

Drive the vehicle slowly and carefully onto the chains. If possible, have someone to guide you while you drive over the chains to ensure that you have centered the tire over the chain. Turn the engine off and reapply the emergency brake.

Step 4:

Connect the chains. Pull the chain ends over the top of the tire from both ends so that the two ends meet. Fasten the closing mechanism and ensure it's properly closed. It is normal for the chains to have a relaxed fit, as long as they are snug enough not to fall off the tire. Repeat this process on each tire.


Tips:

Use snow chains only when driving on roads that have a substantial amount of snow and ice. Using chains directly on asphalt will chop up the road and cause it to deteriorate quickly, and the chains will wear out more quickly.


References:
Read More Like This

How to Resize Images with Kodak EasyShare

kodak,easyshare,photography

Kodak EasyShare is a software program that allows your digital camera to easily share information with your personal computer. EasyShare allows you to connect these devices via USB connection, then to transfer files, such as photos, from one device to another. Also, a number of photo-editing options are built right into the EasyShare software, such as the ability to crop or re-size an image. Using Kodak EasyShare is relatively user-friendly, once you have familiarized yourself with its layout.

Things You'll Need:
  • Kodak EasyShare Camera

Step 1:

Select the menu option on your digital camera. Scroll to the "Picture Size" option or the equivalent on the camera. The following resolutions should be available: "4:3," "3:2" and "16:9." Each resolution can be set to be taken at a certain megapixel rating. The pixel rating determines the clarity and quality of the image. A higher megapixel value will give a clearer image, while lower megapixels will make smaller-sized images that can be easily stored.

Step 2:

Transfer the images from the camera to the computer. Connect the camera to the computer via USB cable, or remove the memory card from the camera and insert it into a card reader on your computer. Drag and drop the pictures into a folder in your computer. The files must reside on the computer before EasyShare can locate them. The program is compatible with Kodak and several other brands of cameras.

Step 3:

Select and save your desired resolution. Open EasyShare and add the pictures you wish to alter. Add them by dragging and dropping them into the main window. Select the image and (using the re-size option) the level of scaling required. The scaling option reduces the image to 75, 50, and 25 percent of its original size. However, the scaling option only allows reductions in size.

Step 4:

Select the location you wish the file to be stored and select the "Save" option. This relocates the altered file to a folder of your choice.


Tips:

Kodak EasyShare also allows you to perform scrap-booking features on your photographs, such as adding captions or speech balloons.

Other options available via EasyShare include printing at home, ordering prints online and emailing. A thoroughly indexed help feature in the program assists you with any issues you may encounter while using the software.


References:
Read More Like This

How to Get More Followers on Twitter

twitter,followers

Twitter is a microblogging network  that allows users to post status updates about where they are, what they are doing or just random thoughts that cross their minds as the day goes by. The site utilizes a message structure that is similar to an SMS text message, with the length being limited to 140 characters.

The key to successful "tweeting" on Twitter is to build a large follower base. The more followers you have, the more likely it is that someone will see and respond to your messages. A simple and direct strategy will help you get more followers on Twitter.

Things You'll Need:
  • Twitter Account 

Step 1:

Sign into your Twitter account and click the "Profile" link at the top of the page. Look over your profile to make sure everything has been completed. You also should upload a profile picture and make sure you've filled out the bio section. If you need to do either of these things, click the "Settings" link at the top of the page to complete your profile. Consider altering the font or background color of your profile to give it a more individual style. Express yourself! Twitter users tend to gravitate towards completed profiles that show you are a person and not a bot.

Step 2:

Look over the main body of your profile page to ensure that you have an ample number of tweets. Twitter will display up to 20 tweets before adding a "More" button. Have at least 20 tweets and make sure that the newest one is from today. This shows potential followers that you are active on Twitter.

Step 3:

Find a member who is active in follow-back circles. Click the "Home" link at the top of the page. Scroll down until you see the search bar on the right side. Type either "#followback" or "#teamfollowback" into the search bar and press "Enter." Look over the people who have recently used the hashtag you searched for and click on one.

Step 4:

Click the "Follow" button to follow this user, then click the "List" link on their profile. Look for lists that identify people who follow back. Click one of these lists to open it, then click the "Following" link to display a list of everyone on the list. Results will be broken up into segments of 20 users per page.

Step 5:

Scroll down the list, clicking the "Follow" button next to each profile. Skip over any users who are tweeting in a foreign language. Also, skip users with a padlock icon, as these will require manual verification. Continue following members in this manner until you have followed several hundred new members. Twitter allows you to follow up to 1,000 members per day but it's generally a good idea to stay a few hundred members below this ceiling.

Step 6:

Wait a minimum of 24 hours. It will take up to a day for some members to follow you back. Be patient and give them time to respond. Many of the individuals you are following may be members of automated follow-back programs that only run once per day. Allow at least a day and you will see a noticeable increase in the number of your followers.

Step 7:

Go to the "Manage Flitter" website using the link provided in the Resources section below and sign in using your Twitter login. This site will process the list of people you follow and the people who follow you on Twitter. It will run a comparative analysis and generate a list of people that you follow but who do not follow you back. Check the box to select everyone on the list and then click "Unfollow." Log out from the Manage Flitter website. Over the next several minutes, your Twitter account will unfollow these users, leaving room for you to follow others.

Step 8:

Begin looking for a new follow-back list so that you can follow an entirely new group of people. The more people you follow, the more that will follow you back. Continuing this process will allow you to build a Twitter account with a substantial number of followers in a very short time.


Tips:

Although this process will work  as described, Twitter does not like it if you are following and unfollowing a large number of accounts. Try not to follow more than 600 new people at once and break your unfollows into increments of 250 or less during any 24 hour period.

References:
Read More Like This

How to Use Jumper Cables on a Dead Battery

automotive,battery,jumper cables

Anyone who drives a car  will face a dead battery sooner or later. Whether you forgot to turn off the headlights, or the battery has just been stressed by cold whether, a dead battery is one of the most basic maintenance issues a car  owner will face. The most common method of dealing with a dead car battery is to give the battery a "jump start". This method delivers an initial charge with jumper cables to get the car started, then the battery will be recharged by the alternator as the engine runs. The process of jump-starting a dead car battery is very simple as long as a few basic steps are adhered to.

Things You'll Need:
  • Car with a charged battery

Step 1:

Position the car with the working battery near the car with a dead battery. Make sure that the running car is parked facing the car with the dead battery as much as possible or if the car batteries are off to one side of the engine, have those sides of the cars next to each other, since jumper cables have a limited length. Turn off the ignition of both vehicles and turn off all electronic devices, such as the radio, lights and air conditioner.

Step 2:

Connect one end of the positive jumper cable to the positive battery post on the car with the dead battery. The positive cable is identified by having red clamps. The positive battery terminal will be marked with "+," and usually has a red cable connected to it. Connect the other end of the positive battery cable to the positive terminal on the car with a good battery. To connect the cables, simply clip the clamp onto the terminal.

Step 3:

Connect one end of the negative jumper cable to an unpainted, clean metal surface under the hood of the car with the dead battery.

Step 4:

Start the car with the good battery. Rev the engine several times to help produce more electrical charge for the other car's battery. Start the car with the dead battery. You may have to try a couple of times before the engine turns over. If it won't turn over initially, give it a few more minutes to allow it a chance to charge some more.

Step 5:

Disconnect the jumper cables. Disconnect the cables in the reverse order that they were connected. Remove the black, negative cables first, then the red, positive cables.

Step 6:

Allow the car with the jumped battery to continue running for at least 30 minutes. As the car runs, the electric charge in the battery will be revitalized. Take the car for a brief drive on the highway to assist this process.

Tips:

Jumping a car battery is a last resort option. Try to properly charge or replace the battery in advance before a jump is required.

Warnings:

Do not allow the black and red clamps of the jumper cables to come into contact with each other if the other ends are connected to a battery.

Do not connect the negative cable to the negative post of the dead battery. This will minimize the risk of an explosion. 

References:
Read More Like This

How to Retrieve Keys from a Locked Car

car,key,lock

At some point, most of us lock our keys inside the car. It can be a frustrating and embarrassing experience. Fortunately, a number of options are available to help remedy the situation if you lock your keys in your car, and they don't involve calling an expensive locksmith service. The important thing is to always have a backup plan.

Things You'll Need:
  • Spare Key
Step 1:

Have spare keys made at a nearby hardware or home improvement store. Keep one key where you know you'll always be able to find it, and other keys with trusted family members and friends. You can always call one of them if you lock your keys in your car. 

Step 2:

Consider hiding a copy of the spare key in a magnetic "Hide-a-Key" case. These are usually available wherever you have keys made. The case is used to hide a set of keys under the car by sticking the magnetic box onto any metal component. Choose a location that is difficult to see, but that you can easily remember.

Step 3:

Find out if your insurance company offers a lock-out service, where it keeps a copy of your key that can be delivered when needed.

Step 4:

Ask the police for help. Most police departments have tools, such as a "slim jim," that can reach the inner mechanics of the door to pop the lock. The best part of seeking help from the police is that the help is free and safe.

Tips:

If your vehicle has the OnStar security service, you can remotely unlock the car doors by calling OnStar on the telephone.

References:
Read More Like This

How to Start a Linen Exporting Business

linen,export,business,start up

Starting an export business  can be a lucrative endeavor. By shipping products to other countries, you can reach new consumer markets that have not yet been saturated by the competition. Many people assume that opening an export business  is a complicated process. While this is certainly true in some circumstances, it largely depends on what items you intend to export. Linen is not consumable, perishable or hazardous. As such, it is not subject to many special regulations that other materials must follow, making it relatively easy to start a linen export business.

Things You'll Need:
  • Linen Suppliers
  • Shipping Partners
  • Receiving Agents
Step 1:

Register a company to operate under, before you begin operating a linen export business. This gives you a legal business identity, and also registers you in the system for purposes of paying sales tax and any applicable employment taxes. If you are the single owner of the business, then an S-Corp is the standard structure to use, since it allows owners to carry business losses as a deduction on their personal income tax returns. If the business is being established as a partnership with two or more individuals, then a Limited Liability Company (LLC) is often the preferred corporate structure to use. If you will be receiving goods overseas via your own overseas import company, then that business will need to be registered separately. 

Step 2:

Establish a supply chain for the linen products you wish to sell, of which there are many varieties. Raw fabric, bathroom linens and garments are just a few categories of linens that you may expect to sell. Determine which types of products you will offer and establish accounts with wholesale outlets that deal in those products. There are many wholesale companies that specialize in linens and textiles. Open an account with these vendors and acquire any product catalogs they offer. As you receive orders, you can purchase them from the wholesaler at significantly reduced rates, allowing you to profit on the sale and shipment of the items.

Step 3:

Research the port where your linens will be shipped and come up with a plan for how the items will be received. Establish a receiving agent who will be responsible for receiving the linens you ship, and properly storing them until they can be collected and distributed to retailers.

There are two primary options available when choosing a receiving agent. The first option is to rent a small amount of warehouse space and hire your own overseas staff to pick up the linens, warehouse them and deliver them to customers. This option retains the most profit, but also has the highest overhead. The second option is to simply sell items to established receiving agents who have their own retail customers. In this case, you will be selling the linens at a slightly lower rate, but you have no costs involved other than the price of shipping the linens. Many exporters like to use a combination of the two.

Step 4:

Select your shipping methods. The best method for shipping your linens depends on the destination city. One method may be the only option available in a particular location, or may be the most economical choice. There are two primary options you can use for shipping large quantities of linen.

The first is to use airline transportation to ship the items. Almost all airports have a special section for cargo shipping, and visiting this location will give you more specific rates for shipping linens from your location to your destination city. If you choose the flight distribution method, you will need to pack the linens into boxes, which can be loaded onto pallets and shrink wrapped.

The second option is to make use of cargo shipping containers, shipped over the sea to arrive at the destination city. This method of shipping is slower than flying, but is much less expensive. It is also open to a wider range of distribution ports, particularly on islands or in coastal regions where airports are not common.

Tips:

Using an online catalog to accept orders via the Internet. Preselling linen in this manner will help you clear inventory much faster.

References:
Resources:
Read More Like This

How to Become a Private Stock Broker

broker,investing,career,stocks

Becoming a private stock broker can be a lucrative career  choice for those who successfully forecast stock markets. Being a broker brings a great deal of responsibility, because others are trusting you to turn their savings  into more money. The broker profession requires a keen understanding of finance and economics, as well as the ability to follow some specific steps in order to succeed in the trading business.

Things You'll Need:
  • BS Degree in Finance or Economics
Step 1:

Begin in high school by taking mathematics and economics courses. Being a successful private broker requires years of practice that allow one to develop insights into how the markets operate under various conditions. Starting at an early age provides more time for these skills to develop. Join your high school's investment club, if one is available. Use pretend money noted on paper to practice different investment strategies. These activities will help develop the skills you will need as a private broker.

Step 2:

Obtain a college degree. Most private brokers obtain a degree in finance or economics. A Bachelor of Science degree is common, although staying long enough to obtain a Master's degree will make a significant difference in the amount of money you will earn in a post-graduate world. Those who wish to entertain corporate clients might also wish to obtain a secondary degree in business administration.

Step 3:

Obtain proper licensing to conduct business as a private broker. The first step is to pass the General Securities Registered Representative Exam. More commonly referred to as the Series 7 exam, this test is administered by the National Association of Securities Dealers, and is required to be employed as a broker anywhere in the United States. Many individual states will require additional credentials. To meet the criteria of these locations, you will also need to pass the Uniform Security Agents State Law Exam, also known as the Series 63 exam, and the Uniform Investment Advisor Law Exam, also know as the Series 65 exam.

Step 4:

Apply to a brokerage house to build experience and clientele. Brokerage houses often hire large numbers of recent graduates with the expectation that many of them will not last more than a year under the pressure of the job. Working for a brokerage house allows you to use name recognition to build a portfolio of clients. It also gives you real-world working experience that will help prepare you for any exams that are required to obtain additional accreditation.

Step 5:

Start a private practice. After working at a brokerage house, you will eventually reach a point where you have learned the skills that are required to operate independently. Reach out to the clients and contacts that you have made while working at other companies, inviting them to look over your new practice. Operating your own private practice allows you to continue offering the same brokerage services to clients, with the primary difference being that you will keep a full portion of the trading profits rather than being paid a commission from another brokerage house.

Tips:

Being a successful private broker largely boils down to being a good salesman. You first must sell yourself and your abilities to a client, and then sell them on the idea of the stocks in which you are interested.

References:

Read More Like This

Wednesday, October 27, 2010

How to Make Money Online with HYIP

hyip,money,investing

HYIP stands for High Yield Investment  Program. These investment opportunities provide investors with the ability to earn incredibly high returns in a short period of time. The downside is that they also carry a substantial risk, so it is easier to lose your money with HYIP than with other investment options. For those who take the time to formulate an investment strategy, it is possible to make enough money with HYIP to offset any potential losses. Following a few basic tips will help you minimize your risk.

Materials:
  • Investment Funds 
Step 1:

Learn the risks associated with HYIP. These high yield programs have the ability to generate exceptional returns, but only because the risk of loss is great. Knowing, understanding, and accepting the risks is a fundamental step when getting involved with HYIP.

Step 2:

Set a budget for investing in HYIP. Many people regard HYIP investments as a form of gambling, and approach the investment with a similar strategy. Determine how much money you can realistically afford to lose, and never place any more than this at risk. In addition to setting an overall investment budget, many people like to establish "stop limits" as well, which means that when your profits reach a specific plateau, you will take down all of your investments and profits.

Step 3:

Get in early. Most HYIP programs have a short life. Many of them go out of business within the first 6 to 8 months, and it is rare to find one that has been around longer than 18 months. These are short term opportunities, so it is important to invest at an early stage, when the program first launches, and to remove your money prior to the opportunity dissolving. This also makes it important to constantly research which new programs are opening.

Step 4:

Diversify your investments. With HYIP being such a volatile investment, it is important to spread your investment capital around. Placing all of your investment dollars into one HYIP programs puts you at risk of losing all of your investment at once. Having the money distributed across several HYIPs will increase the likelihood that sustainable programs will offset the ones that close.

Step 5:

Compound the interest. One of the ways people build up large balances in HYIP is by compounding their interest. These programs pay out daily interest payments, but allow members the option of automatically depositing the interest into their account. Compounding the interest early on will help you build up a large balance, so that even after your original investment is withdrawn, you will still have funds in the program paying you dividends every day.

Warning:

HYIP is a risky investment strategy. Never risk money that you can't afford to lose.

References:
Resources:
Read More Like This

How to Start a Vitamin Shop

vitamins,supplements

A vitamin shop is an ideal business  for many people. Rather than selling products that are unhealthy, vitamin-shop owners can have a clear conscience in knowing that their products improve people's general well-being. Vitamin shops are also profitable ventures, particularly for those who have health conscious people living in the community.

Materials:

  • Business Plan
  • Financial Backing
  • Vitamin Suppliers
  • Retail Location 
Step 1:

Write a business plan  to organize how your vitamin shop will be managed and how much money will be needed to operate it. Refer to the Resources section for a sample business plan template that will help you write a business plan for your vitamin store.

Step 2: 

Raise the money you need to start a vitamin shop. You will need to raise $10,000 to $25,000, depending on how much inventory you will keep on hand. Savings, personal loans and using credit cards for expenses are the primary ways most people fund small businesses. Obtaining loans from family, friends or private investors is also an option. Most banks will only issue a personal loan for a new start up, but you can ask the loan officer if you qualify for a guarantee from the Small Business Association.

Step 3:

Incorporate your business. You can register your business with the office of the secretary of state, or you can go to the local courthouse and file the same papers with the city clerk. Officially incorporating your business allows you to buy vitamins and other supplies at wholesale rates and also gives you indemnity to keep your personal finances  separate from those of the vitamin shop. The process of incorporating is simple and basically involves filling out a template for the "Articles of Incorporation," as well as filling out a form. There is also a one-page form to be completed if you need to obtain a federal employer tax ID number.


Step 4:

Find a retail location for your vitamin shop. You generally want to find a location that has a significant amount of auto or foot traffic. This will help people, who may otherwise miss your advertising campaigns, notice your business . It is important to keep your budget in mind as you look for a location because the more consumer foot traffic the location has access to, the higher the monthly rent will be.


Step 5:

Line up suppliers for the products that you will be selling. Many wholesale vendors specialize in health and beauty products, including a wide assortment of vitamins. Having accounts with as many wholesale suppliers as possible will help you find the lowest price for a particular item and will also allow you to carry a wider variety of vitamin products in your shop.


Step 6:

Develop and implement an advertising strategy that will let the public know about your vitamin shop. Think about who your target consumer groups are, and then consider ways that you can effectively get a message in front of those people. Local newspapers and radio are always good options, and forming advertising partnerships with local gyms and health-food stores will also give your vitamin shop a big push forward.


Tips:

Including a mail-order catalog in each customer's bag will help create more sales that may have otherwise been missed.


References:
Resources:
Read More Like This

    How to Improve VPN Performance in Windows XP

    windows,vpn,network,virtual private network

    A Virtual Private Network (VPN) is a private computer network that uses public communications lines. Computers  in a VPN are spread across multiple locations. Rather than going through the expense of provisioning private network lines, many companies will use a VPN to create a virtual private line on public Internet  connections. This is typically achieved by creating secure communications tunnels that only allow access to authorized users. Using a VPN can sometimes have a noticeable effect on the speed of your Internet connection. This problem can be corrected by optimizing the performance of your VPN.

    Materials:

    Windows XP

    Step 1:

    Increase the Maximum Transmit Unit. Data that is transmitted over VPN connections is sent in packets that are referred to as transmission units. To prevent system overload, the transmission units have a maximum size assigned to them, which is referred to as the Maximum Transmission Unit (MTU). Windows XP has a default setting of 1500 bytes for the MTU, or 2000 bytes for an XP VPN. Increasing the size of the Maximum Transmission Unit means that fewer units are required for each data transmissions.

    Step 2:

    Choose the appropriate tunneling protocol. Virtual Private Networks typically come with two different tunneling protocols: Layer 2 Tunneling Protocol (L2TP) and Point to Point Tunneling Protocol (PPTP). Layer 2 tunneling has more advanced security features, as well as a higher standard of encryption. This makes L2TP the ideal tunneling method for VPNs that transmit confidential information from one device to another. However, this added security comes at the cost of heavier server  load and increased latency time for those using the network connection. Users who have their needs met by a basic security layer will benefit from using a PPTP connection, which carries a lighter server load and consumes a smaller amount of available bandwidth.

    Step 3:

    Monitor your hardware topology. A VPN typically involves site-to-site connections involving two or more remote offices. It is important for each office or connection point to have hardware that is dedicated to maintaining the VPN tunnel. The servers that are dedicated to each connection point on the VPN give you the ability to increase the available bandwidth on any particular part of the VPN, thereby increasing the size of the tunnel and allowing more users to utilize the system. Most Network Administrators  will use special VPN monitoring software that will analyze the traffic flowing over the network and determine when a bandwidth increase is required.

    Tips:

    Many VPNs come as part of a managed service, where a third party designs and maintains your secure network.

    References:

    Read More Like This